Authentik SSO with openZro Self-Hosted (Advanced)
Authentik is an open-source identity provider focused on flexibility and security. It serves as a self-hosted alternative to commercial solutions like Okta and Auth0, providing single sign-on (SSO), multi-factor authentication (MFA), access policies, user management, and support for SAML and OIDC protocols.
Standalone Setup (Advanced)
This guide wires Authentik as openZro's only identity provider — Dex is disabled and the management daemon talks directly to Authentik for both token validation and user lifecycle. Choose this path only if all three apply:
- Authentik is the source of truth for user lifecycle. You want openZro to call Authentik's API to list, invite, and delete users — so deleting a user in openZro removes them from Authentik too. The recommended setup (Management Setup) only consumes tokens; it cannot write back.
- You need just one IdP, and it's Authentik. This path doesn't support multiple upstreams — there's no Dex to aggregate them.
- You're willing to give up the bootstrap admin fallback. No embedded local user store. If Authentik is down or misconfigured, nobody can log into the dashboard.
For everyone else — multi-IdP shops, anyone wanting a static admin fallback, or operators who only need authentication (not user lifecycle writeback) — use the Management Setup (Recommended) in the main Authentik documentation instead.
If you prefer not to self-host an Identity and Access Management solution, you could use a managed alternative like Auth0.
Prerequisites
- Authentik instance running with SSL
- Docker and Docker Compose installed for openZro
Step 1: Create OAuth2/OpenID Provider in Authentik
- Navigate to Authentik admin interface
- Click Applications on the left menu, then click Providers
- Click Create to create a new provider
- Select OAuth2/OpenID Provider and click Next
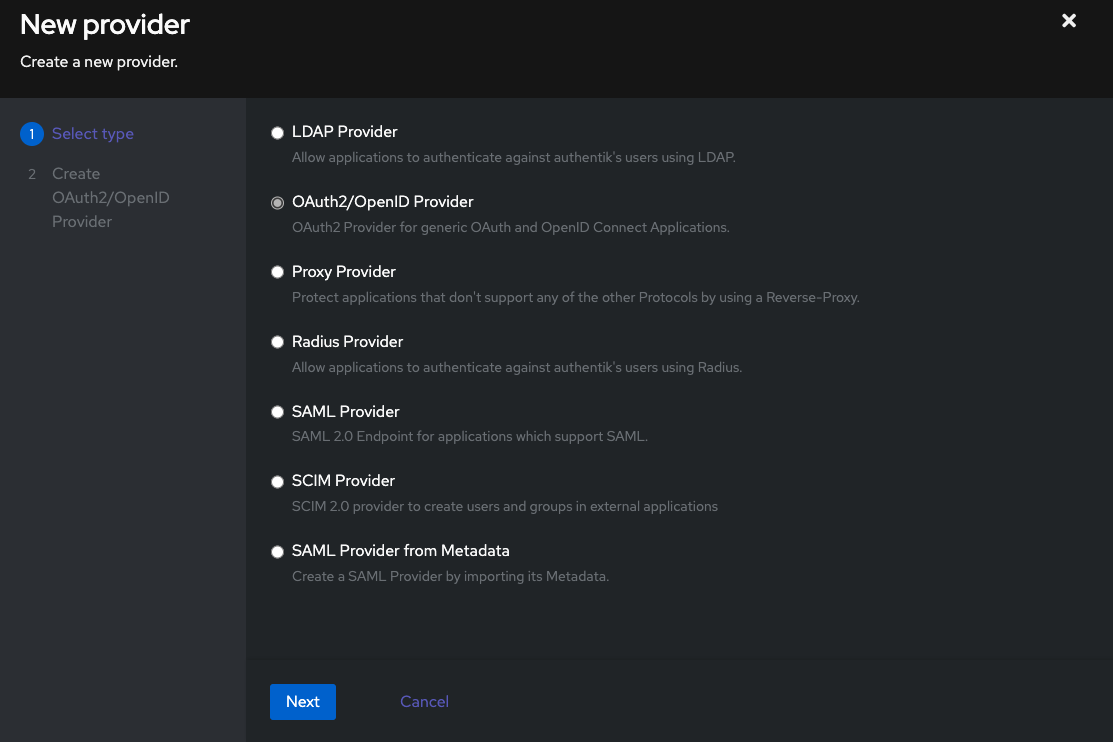
- Fill in the form with the following values:
- Name:
openZro - Authorization Flow:
default-provider-authorization-explicit-consent (Authorize Application) - Client type:
Public - Redirect URIs/Origins (RegEx):
- Regex:
https://<domain>/.* - Strict:
http://localhost:53000
- Regex:
- Advanced protocol settings:
- Access code validity:
minutes=10 - Subject mode:
Based on the User's ID
- Access code validity:
- Signing Key: Select any cert present, e.g.,
authentik Self-signed Certificate
- Name:

- Click Finish
- Note the Client ID for later use
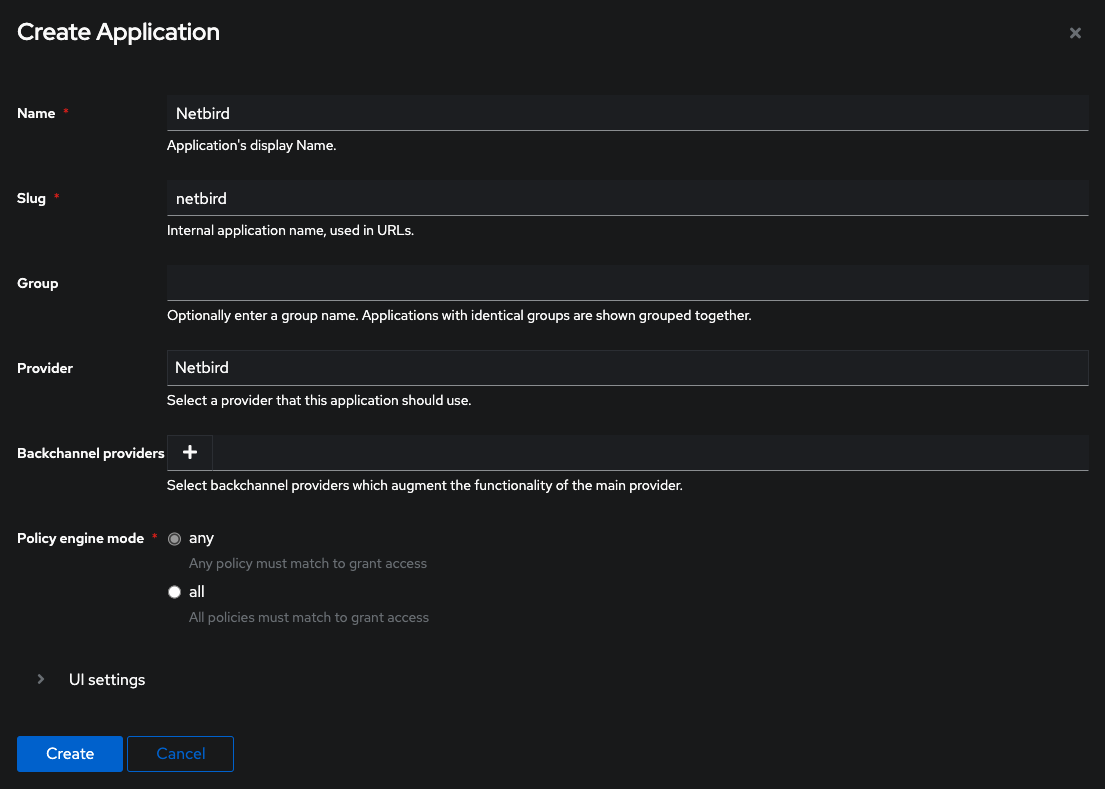
Step 2: Create Application in Authentik
- Click Applications on the left menu, then click Applications
- Click Create to create a new application
- Fill in the form:
- Name:
openZro - Slug:
openzro - Provider: Select the
openZroprovider you created
- Name:
- Click Create
Step 3: Create Service Account
- Navigate to Authentik admin interface
- Click Directory on the left menu, then click Users
- Click Create Service Account
- Fill in the form:
- Username:
openZro - Create Group: Disable
- Username:
- Click Create
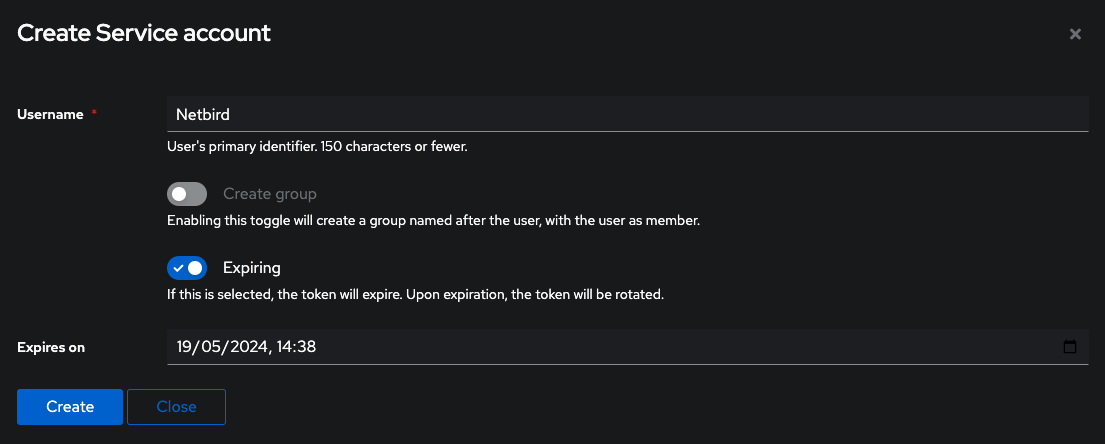
- Note the service account username
- Create an app password: Go to Directory → Tokens and App passwords
- Create a new app password, selecting the openZro service account as the User
- Save the app password for later use
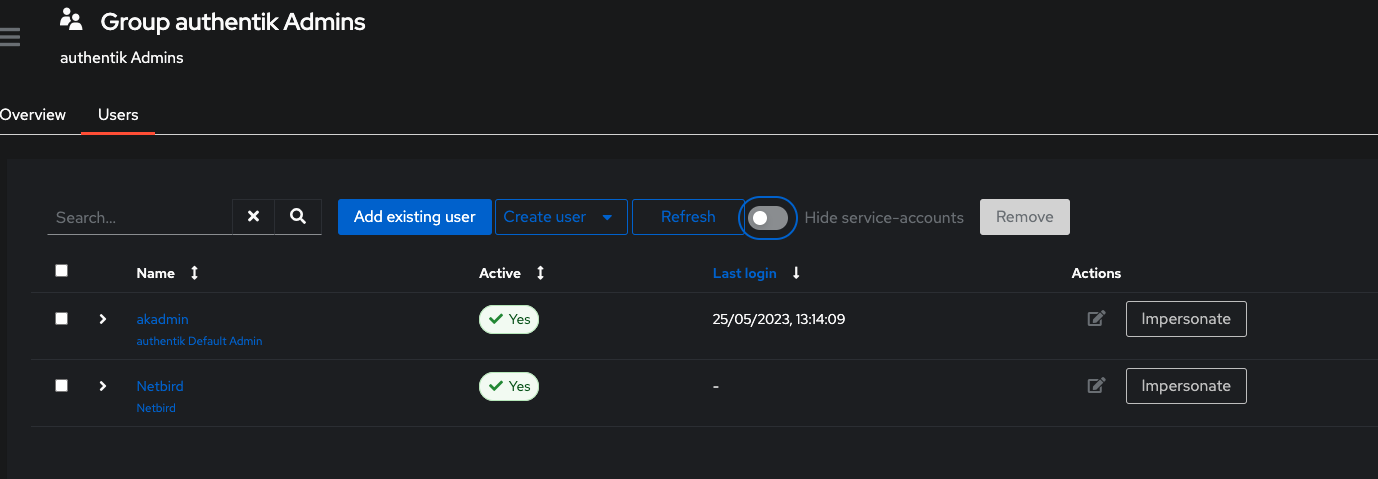
Step 4: Add Service Account to Admin Group
- Click Directory on the left menu, then click Groups
- Click authentik Admins from the list and select Users tab
- Click Add existing user and click + button
- Select openZro and click Add
- Disable Hide service-accounts and verify the user is added
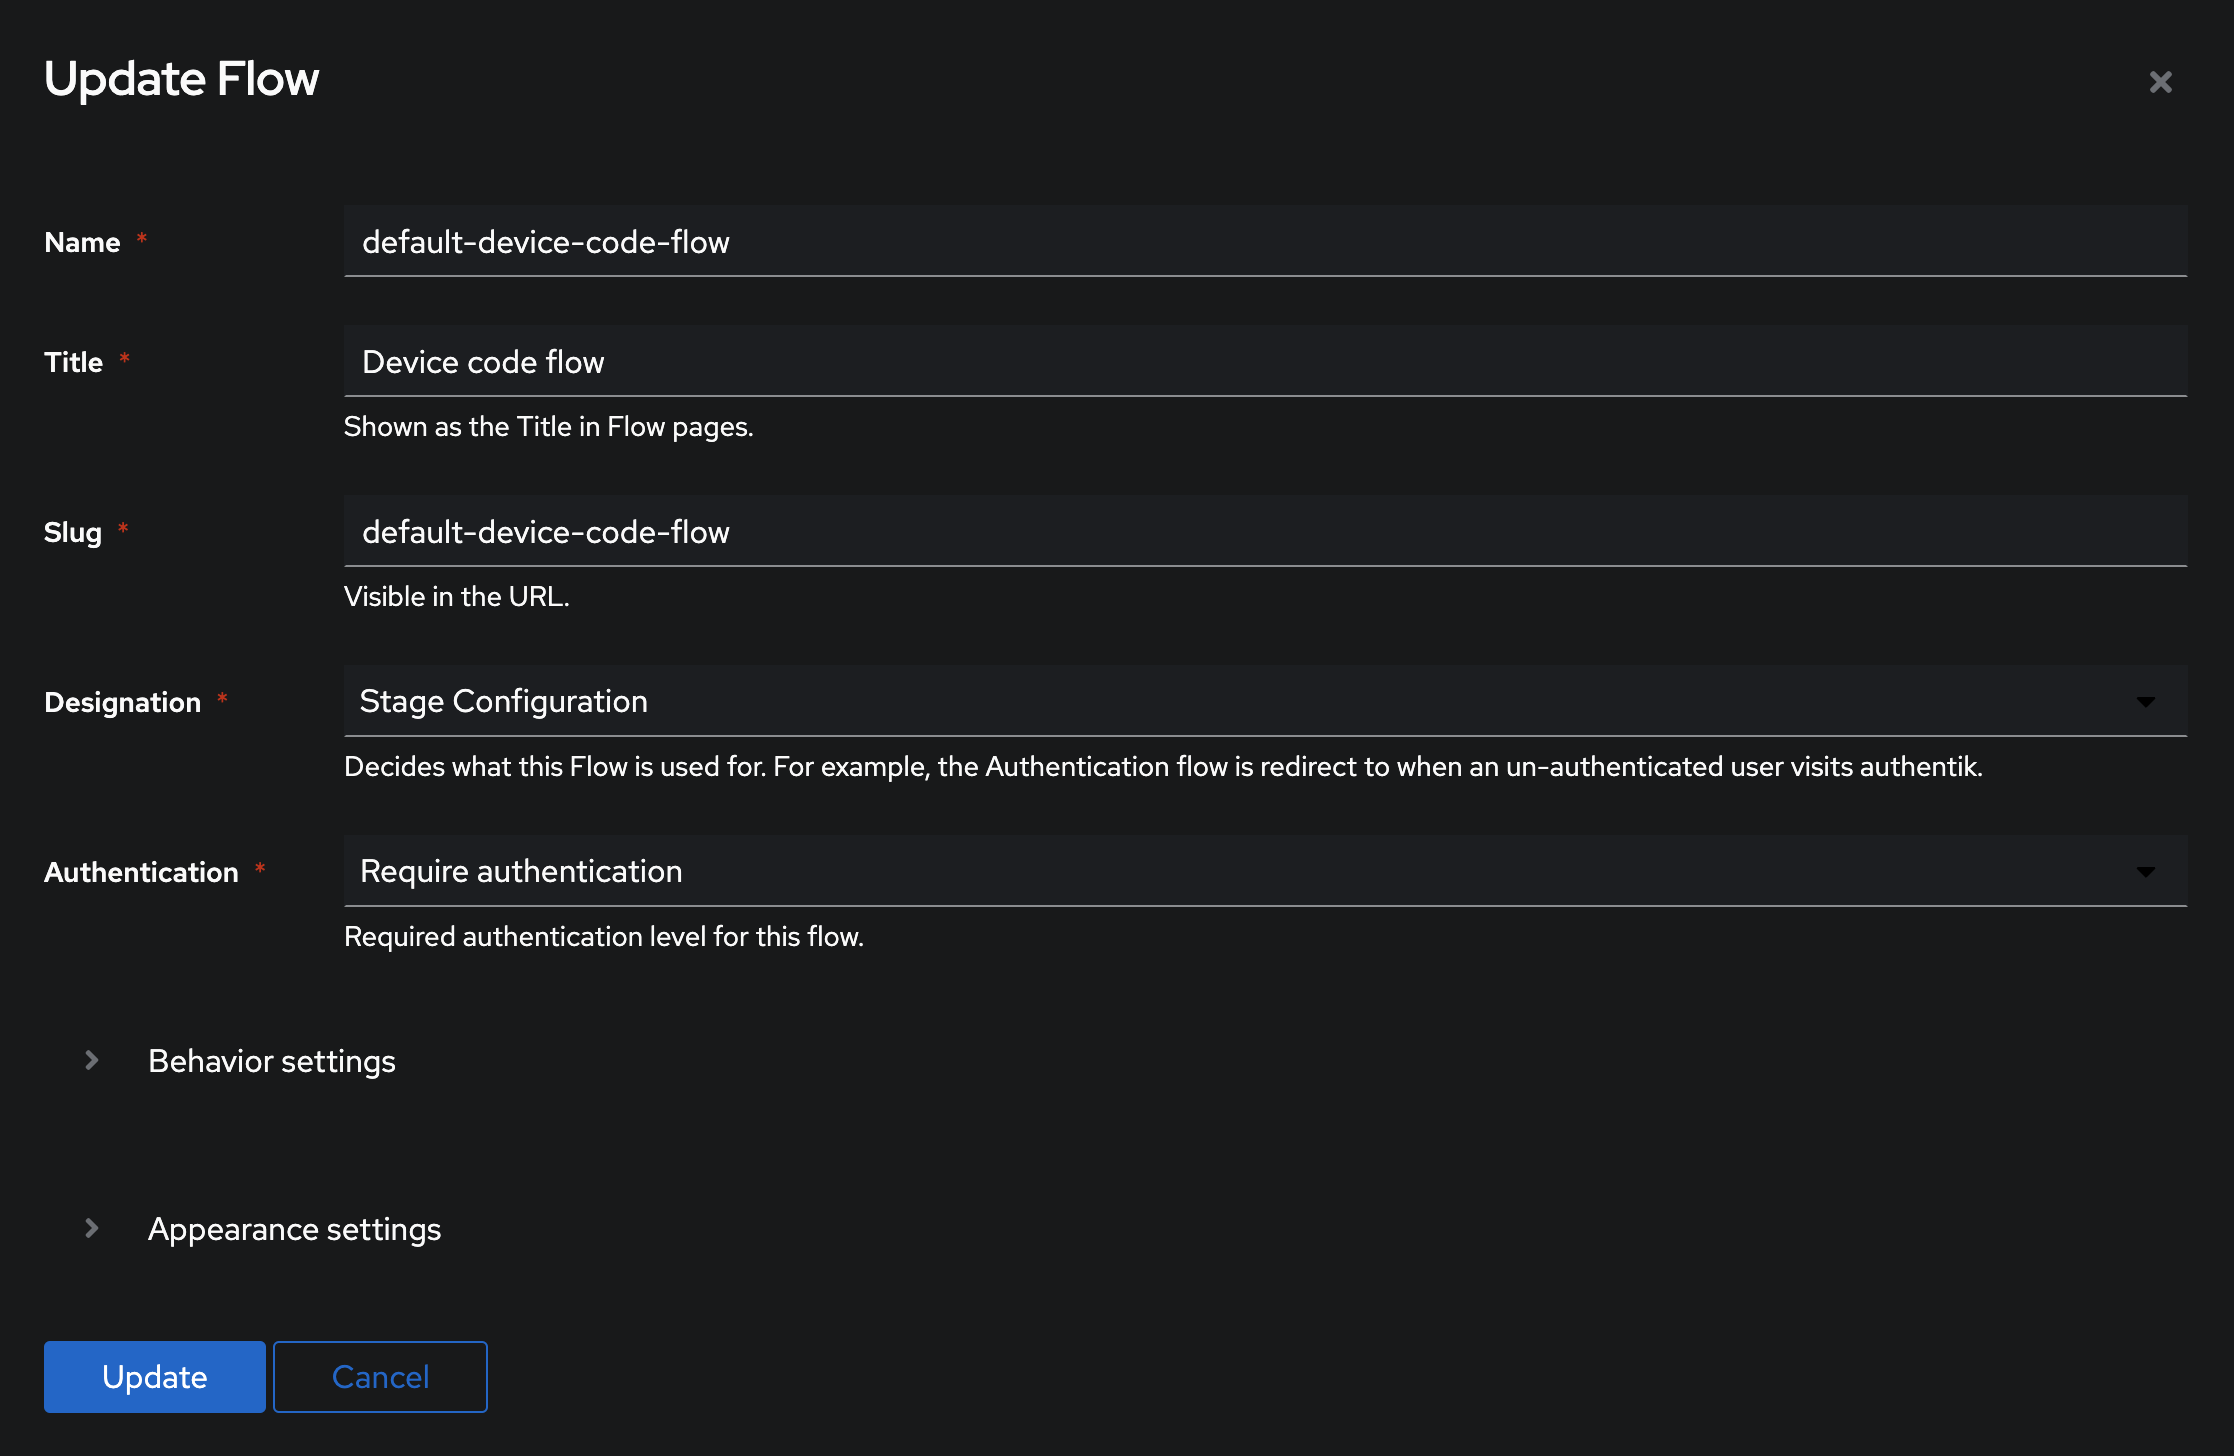
Step 5: Create Device Code Flow
- Click Flows and Stages on the left menu, then click Flows → Create
- Fill in the form:
- Name:
default-device-code-flow - Title:
Device Code Flow - Designation:
Stage Configuration - Authentication:
Require authentication
- Name:
- Click Create
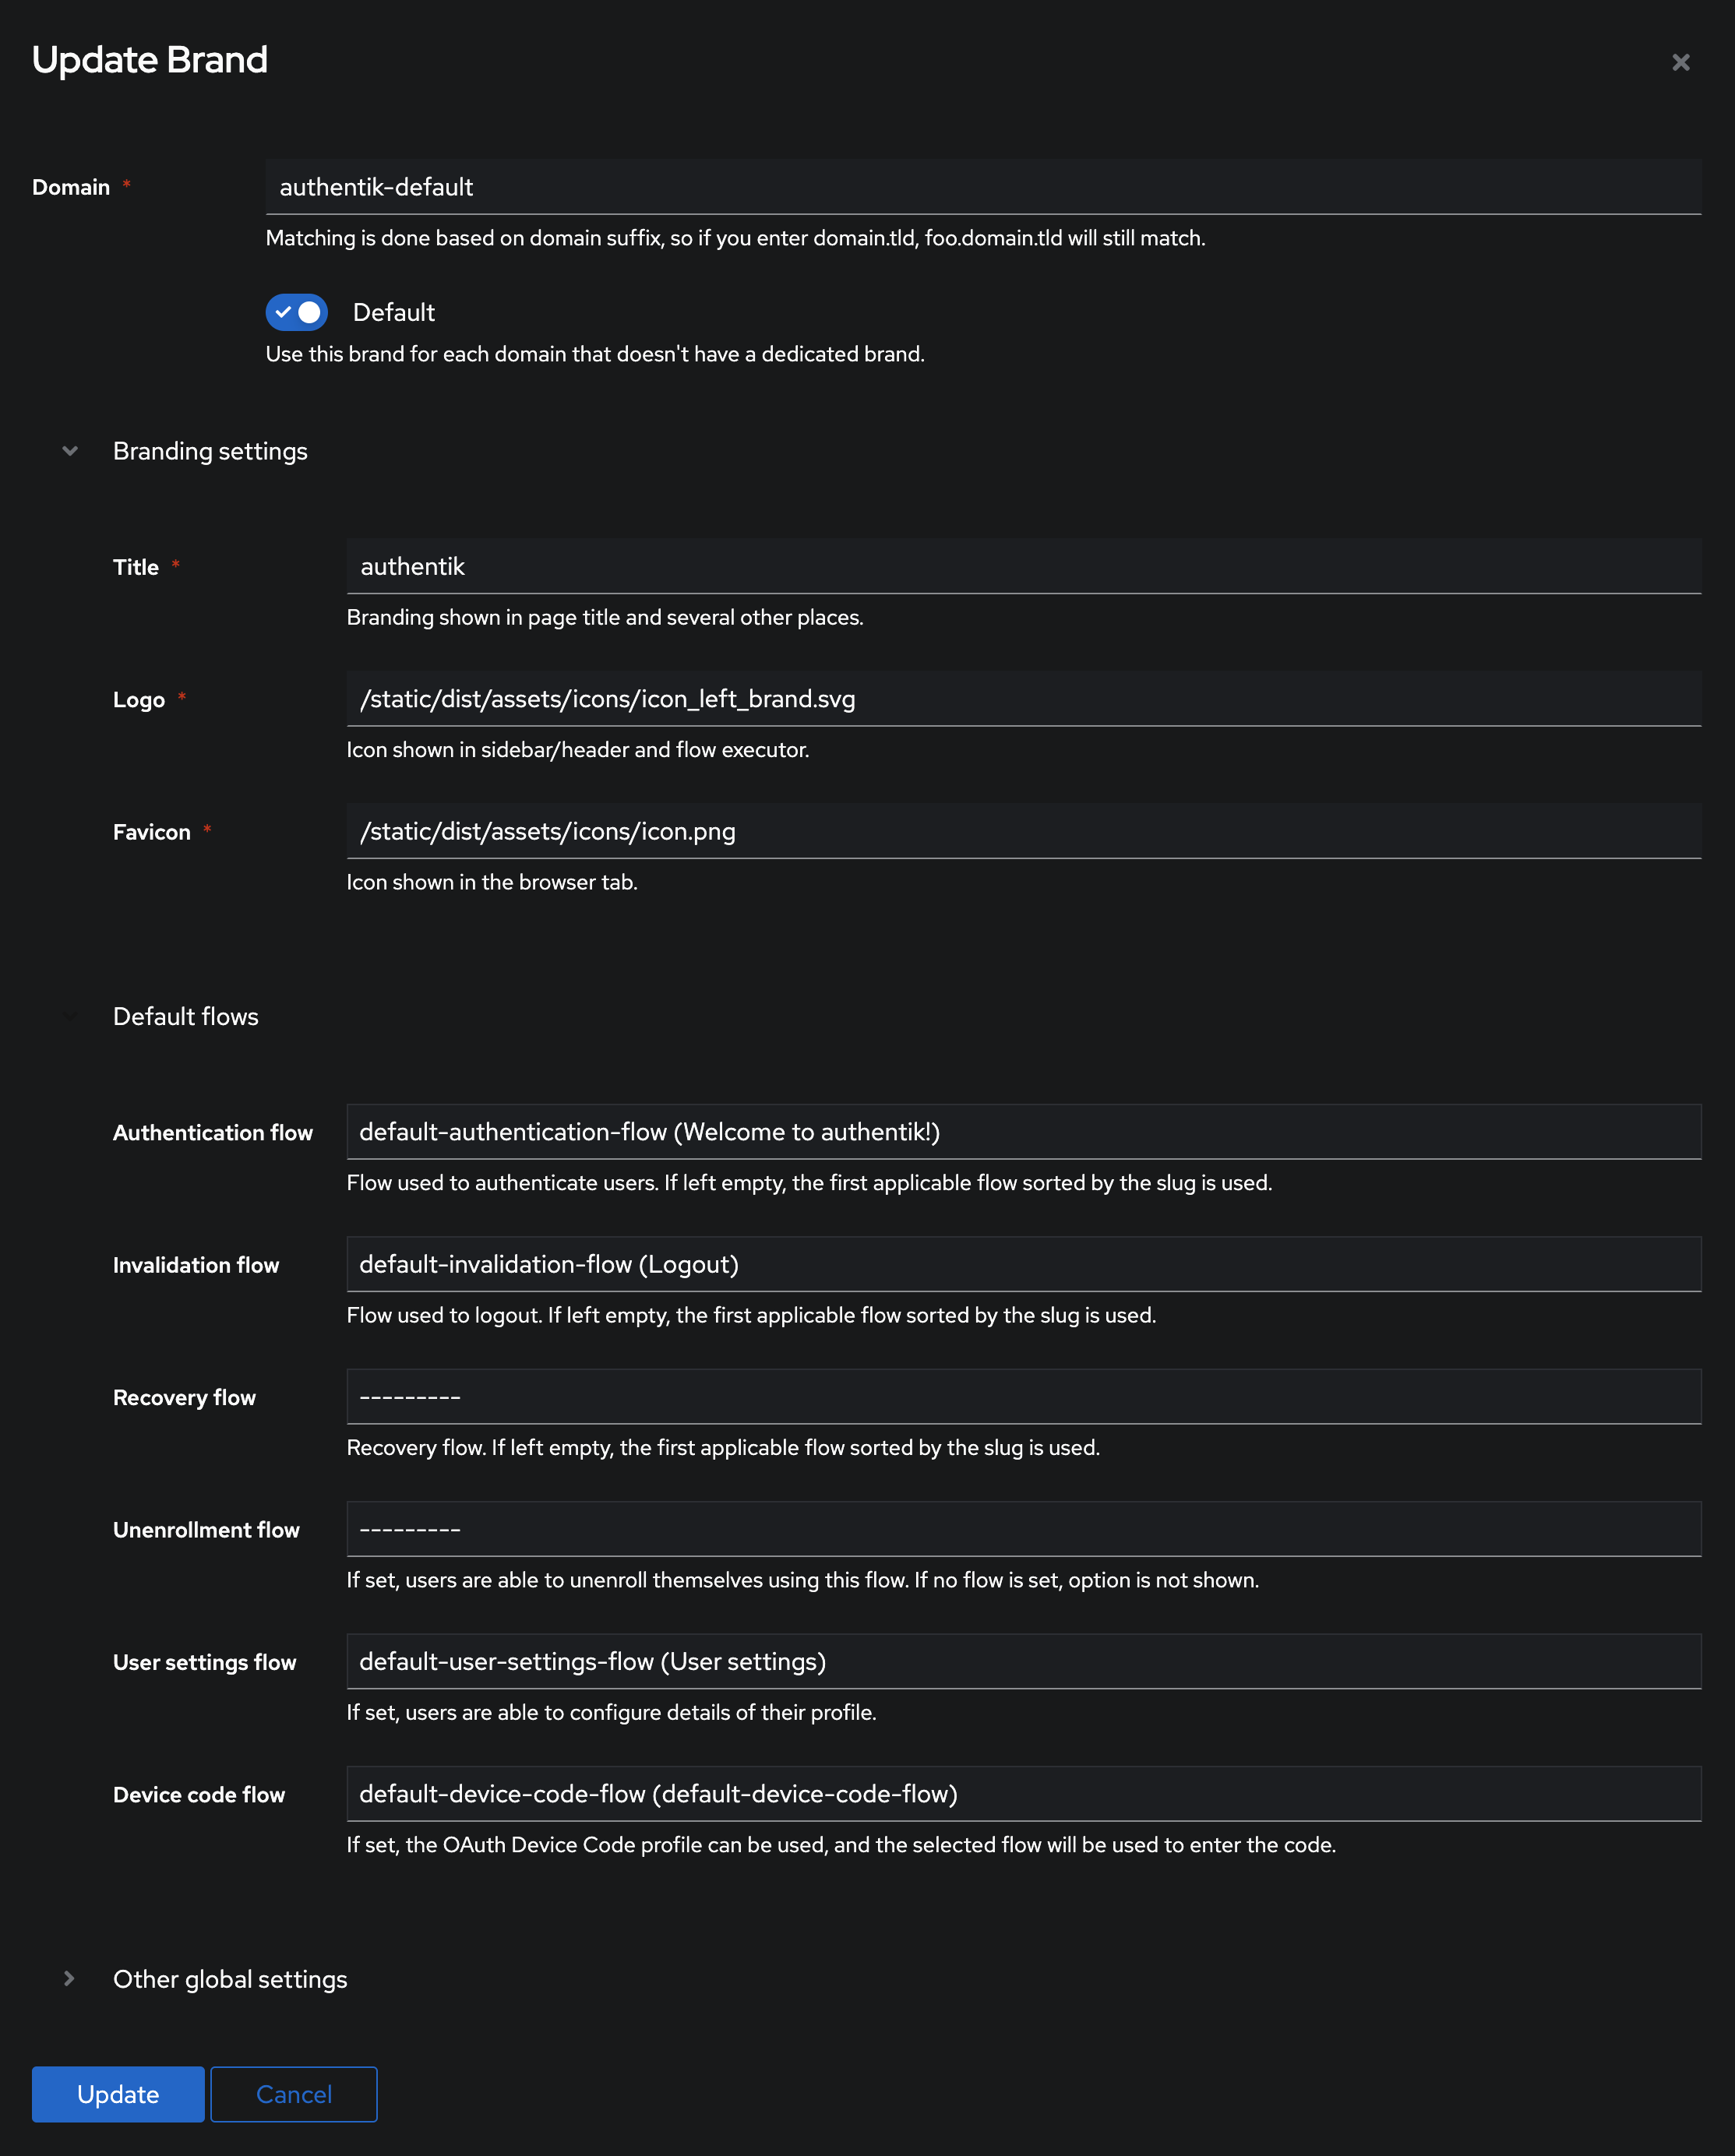
- Click System on the left menu, then click Brands
- Click edit on authentik-default
- Under Default flows, set Device code flow to
default-device-code-flow - Click Update
Step 6: Configure openZro
Your authority OIDC configuration will be available at:
https://<YOUR_AUTHENTIK_HOST_AND_PORT>/application/o/openzro/.well-known/openid-configuration
Double-check if the endpoint returns a JSON response by calling it from your browser.
Set properties in the setup.env file:
OPENZRO_AUTH_OIDC_CONFIGURATION_ENDPOINT="https://<YOUR_AUTHENTIK_HOST_AND_PORT>/application/o/openzro/.well-known/openid-configuration"
OPENZRO_USE_AUTH0=false
OPENZRO_AUTH_CLIENT_ID="<PROVIDER_CLIENT_ID>"
OPENZRO_AUTH_SUPPORTED_SCOPES="openid profile email offline_access api"
OPENZRO_AUTH_AUDIENCE="<PROVIDER_CLIENT_ID>"
OPENZRO_AUTH_DEVICE_AUTH_CLIENT_ID="<PROVIDER_CLIENT_ID>"
OPENZRO_AUTH_DEVICE_AUTH_AUDIENCE="<PROVIDER_CLIENT_ID>"
OPENZRO_AUTH_REDIRECT_URI="/auth"
OPENZRO_AUTH_SILENT_REDIRECT_URI="/silent-auth"

OPENZRO_MGMT_IDP="authentik"
OPENZRO_IDP_MGMT_CLIENT_ID="<PROVIDER_CLIENT_ID>"
OPENZRO_IDP_MGMT_EXTRA_USERNAME="openZro"
OPENZRO_IDP_MGMT_EXTRA_PASSWORD="<SERVICE_ACCOUNT_PASSWORD>"

# Needs disabling due to issue with IdP. Learn more: https://github.com/openzro/openzro/issues/3654
OPENZRO_AUTH_PKCE_DISABLE_PROMPT_LOGIN=true
Step 7: Continue with openZro Setup
You've configured all required resources in Authentik. Continue with the openZro Self-hosting Guide.
Troubleshooting
Service account authentication fails
- Ensure you're using the app password, not the account password
- Verify the service account is in the authentik Admins group