Install openZro on TrueNAS
openZro can now be installed on TrueNAS via TrueNAS Apps (the built-in app catalog). If you need help setting up TrueNAS from scratch (install, storage pools, datasets, users, SMB sharing, and more), see our Knowledge Hub Guide: TrueNAS Made Easy.
The openZro app on TrueNAS runs in a Docker container. You cannot use the peer's openZro IP address or openZro domain (hostname) to connect directly to your TrueNAS instance traffic to those addresses reaches the container, not the TrueNAS host. See Access TrueNAS via openZro Networks below for the full steps.
Install openZro from Catalog
- In TrueNAS, go to Apps and search for openZro. If it doesn't appear, refresh the catalog (e.g., Discover Apps or the catalog refresh option in your TrueNAS version).
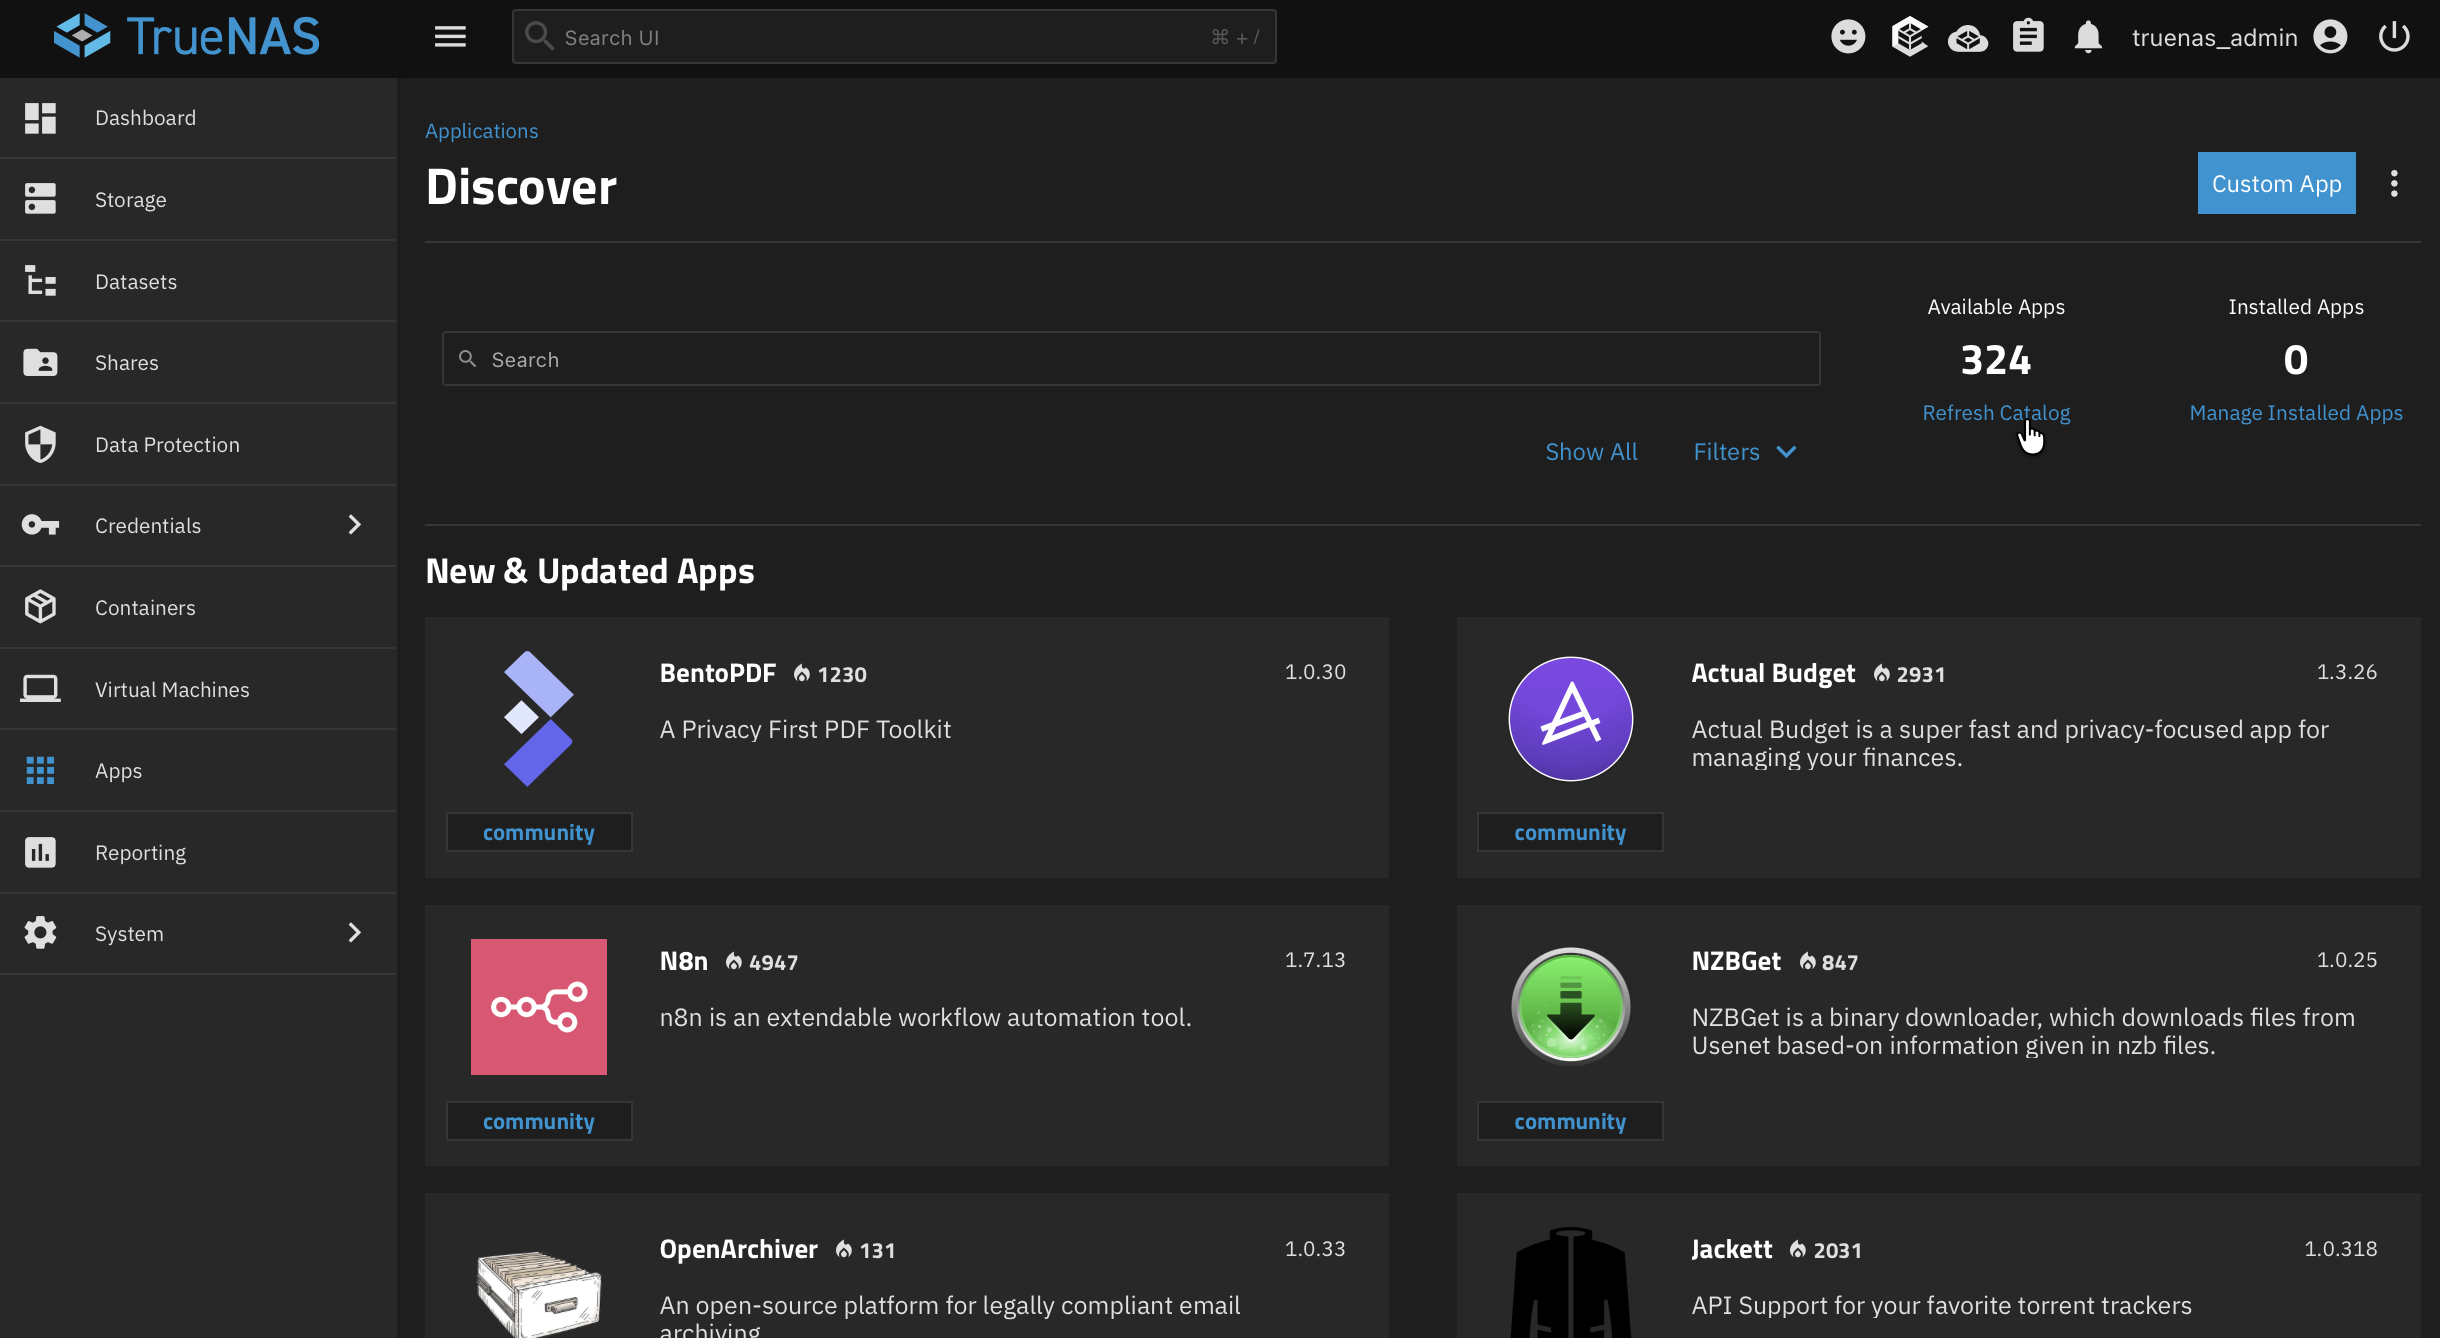
- Click Install and configure the app as described below. Most defaults are fine; the main fields you need to set are Hostname and Setup Key.

- After installation, confirm the app is Running in the Apps list.
- Open your openZro dashboard and go to Peers. You should see your TrueNAS peer listed. Rename it (e.g., "TrueNAS" or "NAS") if you like for easier identification.
App configuration
When you install the openZro app, TrueNAS shows an Edit openZro Client form. Use this as a guide:
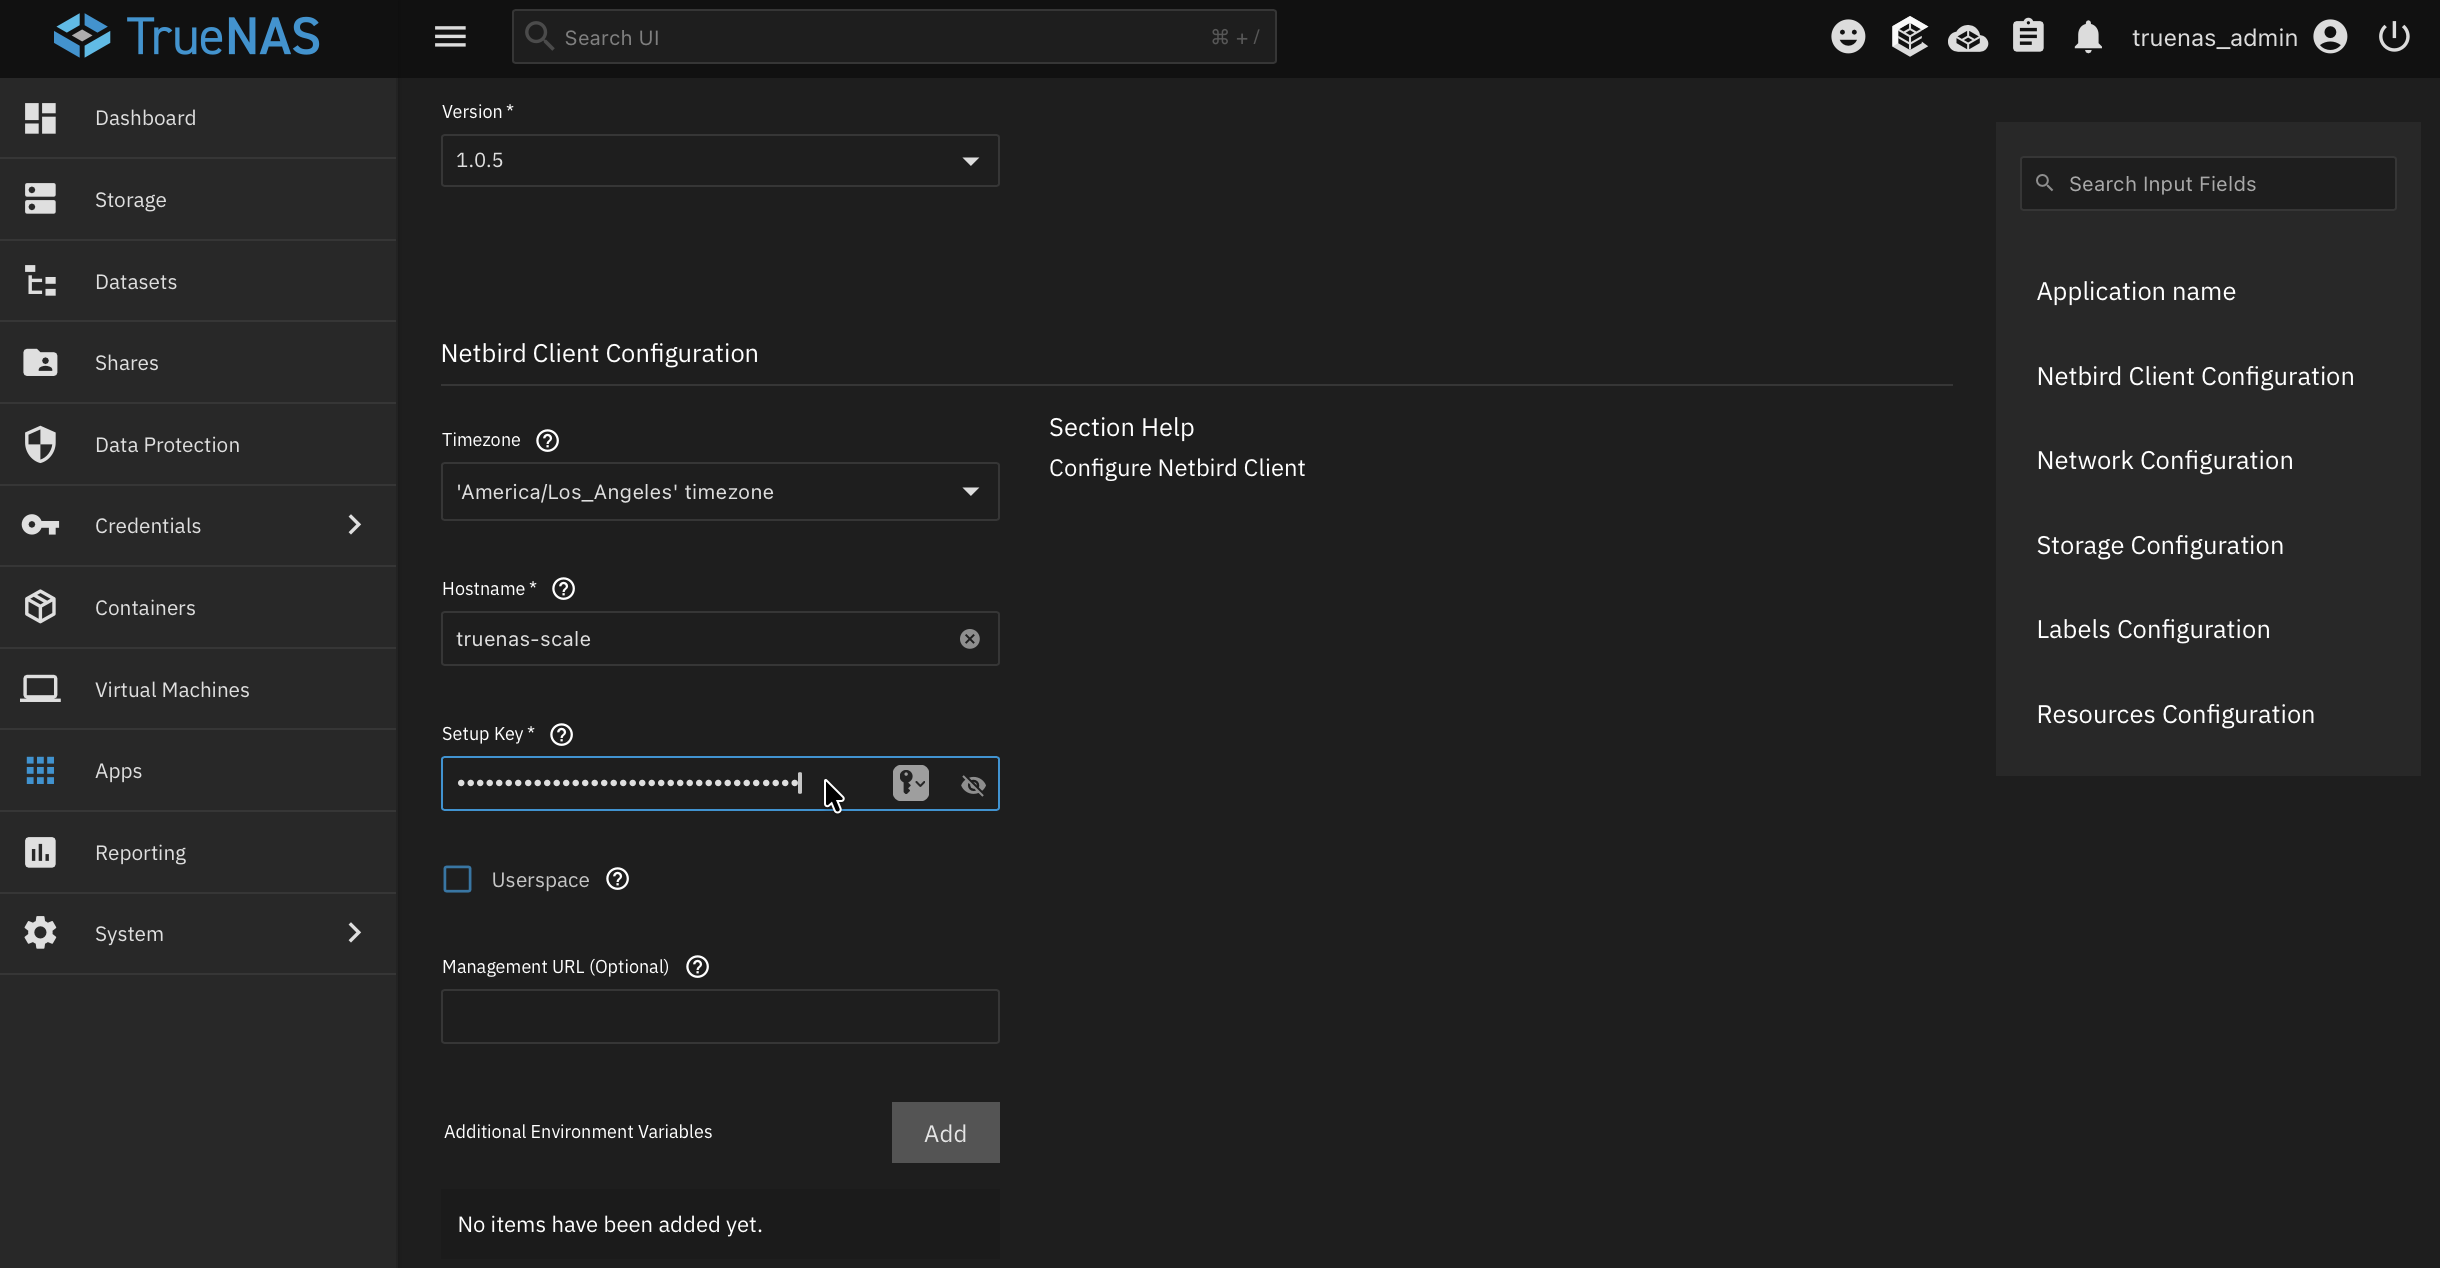
openZro Client Configuration
- Application name: Display name in TrueNAS (e.g., "openZro" or "openZro Client"). Default is fine.
- Timezone: Leave default unless you need a specific timezone for logs.
- Hostname: Name this peer will use in openZro (e.g., "truenas" or "nas"). Pick something you’ll recognize in the dashboard.
- Setup Key (required): Paste the setup key you created in Generate your Setup Key. This registers the TrueNAS peer with your openZro network.
- Userspace: Leave default (userspace networking). Only change if you have a specific need.
- Management URL (optional): Leave empty for openZro Cloud (
https://api.openzro.io). Set this only if you use a self-hosted management server. - Additional Environment Variables: Leave empty unless you need extra environment variables.
Network Configuration
- Host Network: Enable Host Network so the openZro container uses the TrueNAS host's network stack. Without it, the container only has its own network and cannot reach your LAN or act as a routing peer.
Storage Configuration
- State Storage: Use the default (e.g., ixVolume) so openZro can persist its state. This keeps the peer identity and config across app restarts.
Resources Configuration
- CPUs and Memory (MB): Defaults are usually sufficient. Increase if you have many peers or heavy routing.
You can leave Labels and Additional Storage empty unless you use them for access policies or custom storage.
Access TrueNAS via openZro Networks
Because openZro on TrueNAS runs inside a Docker container, you cannot connect directly to the TrueNAS host or its services by IP as you would to a normal peer. To reach TrueNAS or other devices on the same LAN, use openZro Networks:
- Create a openZro Network: In the dashboard, go to Networks → Add Network. Name it (e.g., "Home LAN" or "TrueNAS LAN").
- Add the TrueNAS peer as a routing peer: In that network, click Add Routing Peer and select the TrueNAS peer. This makes TrueNAS the gateway for traffic into your local subnet.
- Add a network resource: Click Add Resource. Either:
- Add your entire LAN subnet (e.g.,
192.168.1.0/24) so you can reach TrueNAS and any other device on that subnet, or - Add a single resource (e.g.,
192.168.1.100/32) if you only need access to the TrueNAS host.
- Add your entire LAN subnet (e.g.,
After you define an access control policy that allows the right peers or groups to reach this network, you can access TrueNAS and other resources on that subnet through the TrueNAS routing peer.
Video Walkthrough
Install and configure TrueNAS for home server storage, then securely access it from anywhere using openZro. Covers ZFS pools, SMB sharing, apps, and zero-trust remote access, see our Knowledge Hub Guide: TrueNAS Made Easy.
- Make sure to star us on GitHub
- Follow us on X
- Join our Slack Channel
- openZro latest release on GitHub